How do you add a client in Coachably?
TL;DR: Tap Add Client, enter your client’s name and email, and Coachably emails them a branded invite with your name. They join through a web link — no app to install. Leave the invite off to add them silently and invite later.
How do you add a client?
You add a client and invite them from one window.
- In your client list, tap Add Client to open the Add New Client window.
- Fill in First Name, Last Name and Email Address. All three are required, and the email must be valid.
- Keep Give the client access to the app on to email them a join link, or turn it off to add them silently.
- Tap Send Invitation (checkbox on) or Add Client (checkbox off).
The client appears in your list right away. Missing or invalid details show a hint next to the field.
What does your client receive?
Your client gets an email in their own language, from Coachably. The subject reads “Your name invited you to Coachably”, and it greets them by first name.
The email has a Set password & activate account button plus a paste-able link. That link stays valid for 14 days.
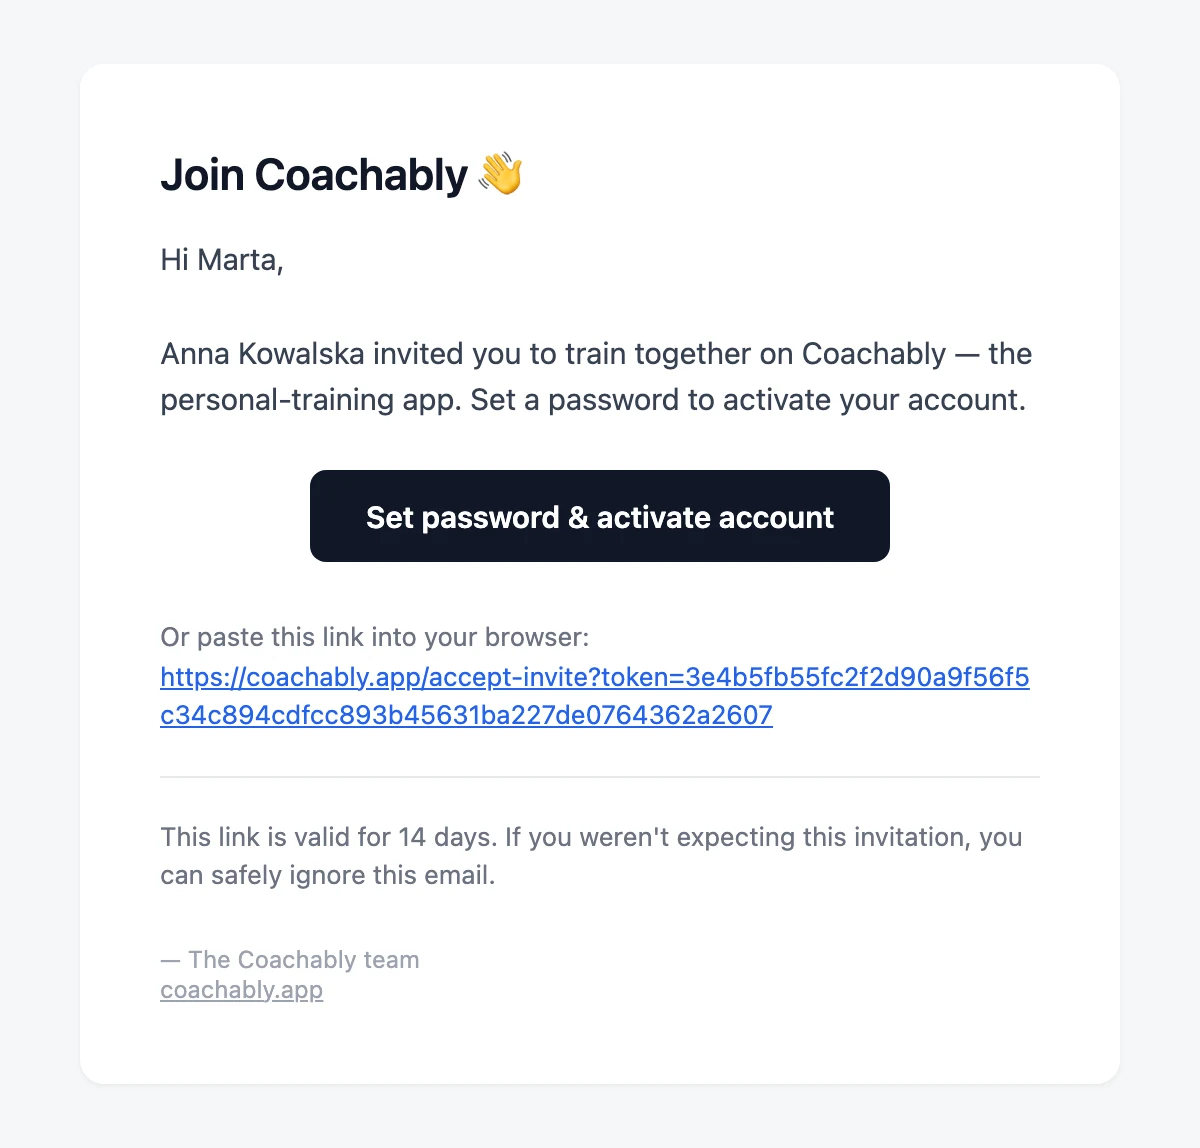
Clicking it opens a Join Coachably page showing your name and their own email, locked. They set a password (at least 8 characters), confirm it and join. There’s nothing to install.
How do you check invite status?
Each client in your list carries a status badge:
- Not invited — you added them, but no invite went out.
- Invited — the invite is sent and waiting for the client.
- Joined — the client set a password and joined.
How do you resend or remove an invite?
Use the ⋮ menu on any client row.
- Open the ⋮ menu on the client.
- If the client is Not invited, tap Send invite.
- If the client is Invited, tap Resend invite to email the link again.
- To cancel, tap Remove invite and confirm. The old link stops working, and you can send a new one later.
FAQ
Can I add a client without sending an invite? Yes. Turn off Give the client access to the app when you add them. Send the invite later from the ⋮ menu on their row.
Does the client need to install an app to join? No. They open the link in their email and set a password in the browser. Nothing to install.
How long is the invite link valid? 14 days. After that, resend the invite from the ⋮ menu to give the client a fresh link.
How do I resend or cancel an invitation? Open the ⋮ menu on the client. Tap Resend invite to send it again, or Remove invite to cancel it.
What do “Not invited”, “Invited” and “Joined” mean? In order: no invite was sent; the invite is sent and pending; the client set a password and joined.